Category: Basement and Crawlspace Mold

  • Understanding Home Mold Remediation Costs in Sandy, UT: What You Need to Know

    Understanding Home Mold Remediation Costs in Sandy, UT: What You Need to Know

    Mold is a common yet serious issue that many homeowners face, especially in areas like Sandy, UT, where humidity and moisture can create the perfect environment for mold growth. If left untreated, mold can not only damage your property but also pose significant health risks to you and your family. This article will provide a comprehensive guide to understanding mold remediation costs in Sandy, UT, and what factors influence these expenses.

    What is Mold Remediation?

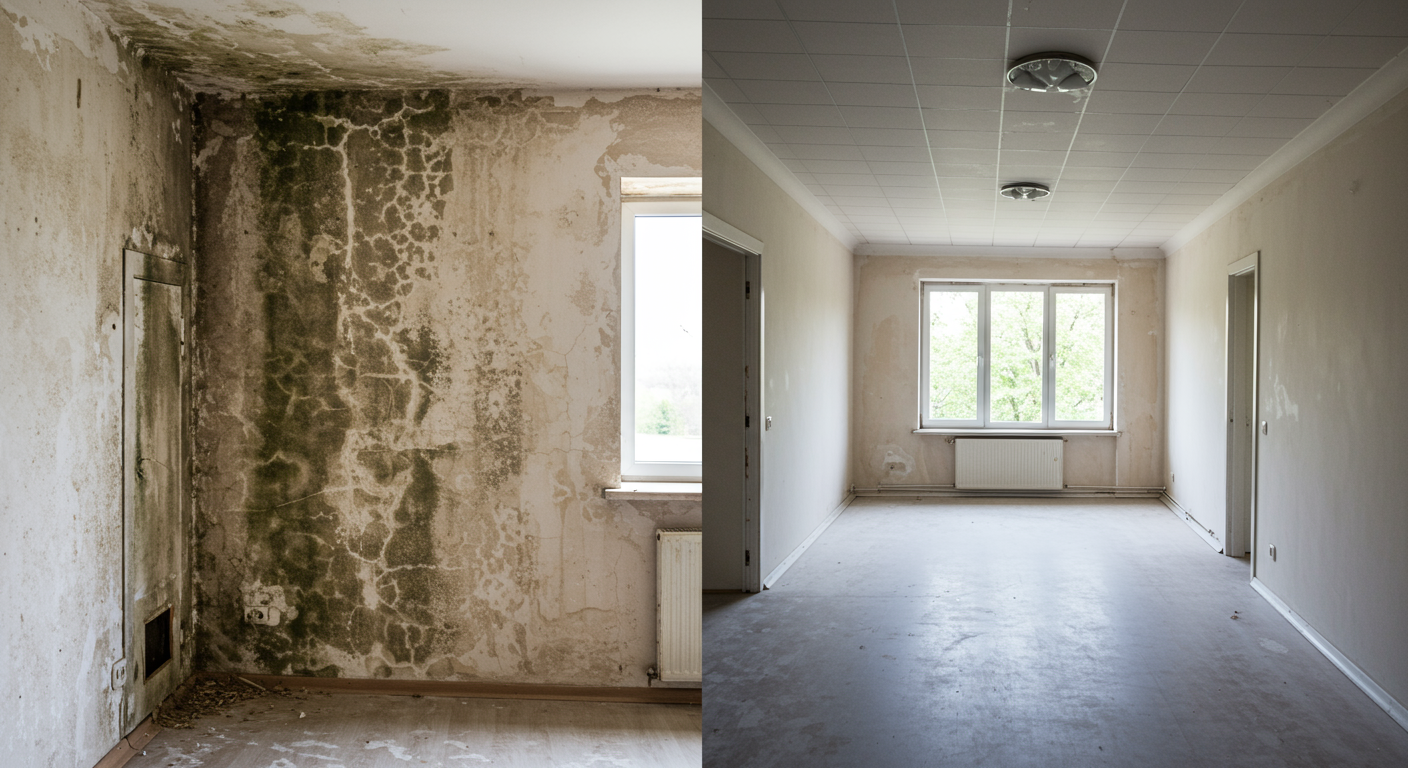
    Mold remediation refers to the process of identifying, removing, and preventing mold growth in a property. This process is essential for maintaining a healthy living environment and ensuring the structural integrity of your home. Mold can grow in damp areas such as basements, bathrooms, and kitchens, often going unnoticed until it becomes a significant issue.

    Health Risks Associated with Mold

    Exposure to mold can lead to various health problems, including respiratory issues, allergies, and skin irritation. For individuals with asthma or weakened immune systems, mold exposure can be particularly harmful. Addressing mold growth promptly is crucial to prevent these health risks and maintain a safe home environment.

    Average Costs for Mold Remediation in Sandy, UT

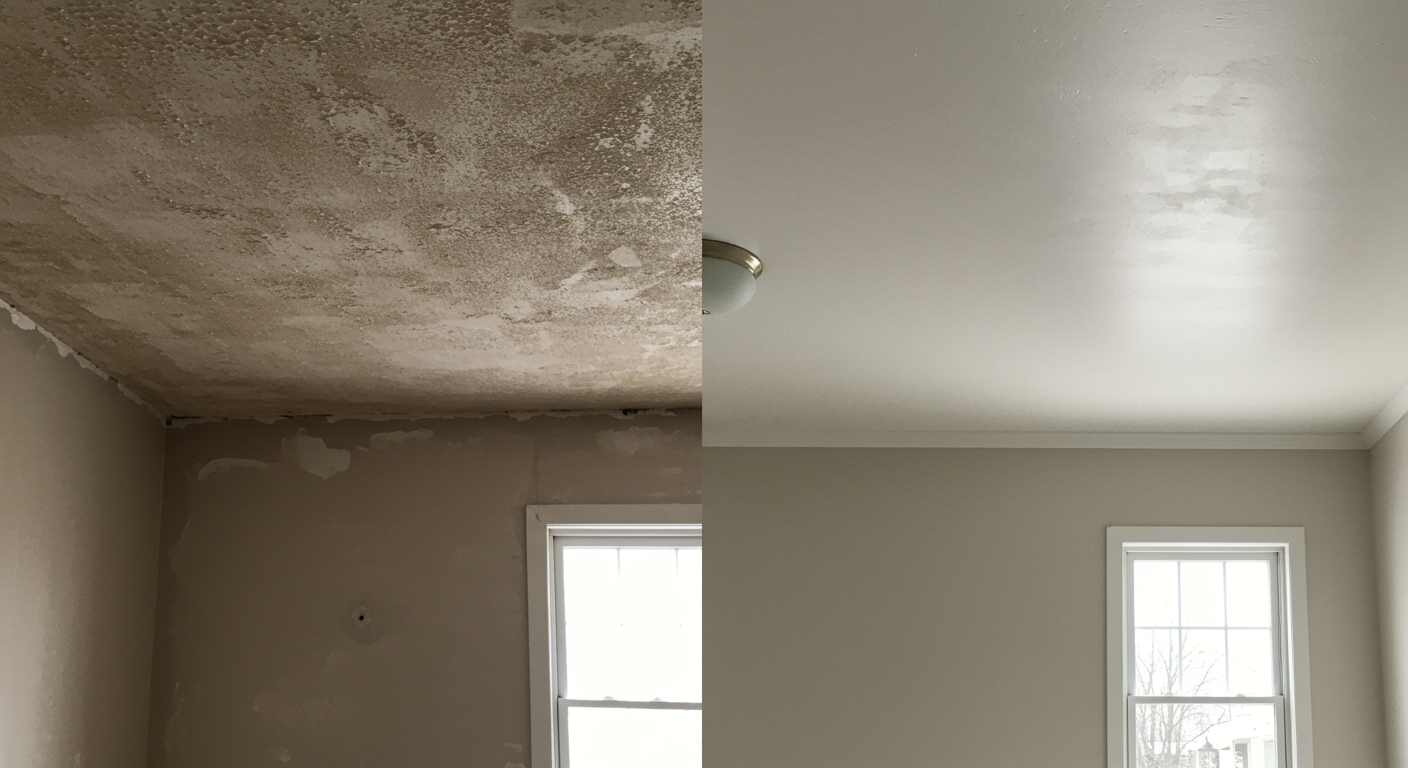
    The cost of mold remediation in Sandy, UT, can vary significantly depending on several factors. On average, homeowners can expect to pay between $239 and $3,844 for mold removal services. The final cost often depends on the size of the affected area, the extent of the infestation, and the methods used for remediation.

    Factors Influencing Cost

    • Size of the Home: Larger homes typically require more extensive remediation efforts, which can increase costs.
    • Extent of Infestation: Minor mold issues may only require surface cleaning, while severe infestations might necessitate structural repairs.
    • Type of Mold: Some types of mold, such as black mold, are more challenging to remove and may require specialized treatments.
    • Location of Mold: Mold in hard-to-reach areas, such as crawl spaces or behind walls, can be more expensive to address.

    By understanding these factors, homeowners can better anticipate the costs associated with mold remediation and plan accordingly.

    The Mold Inspection Process

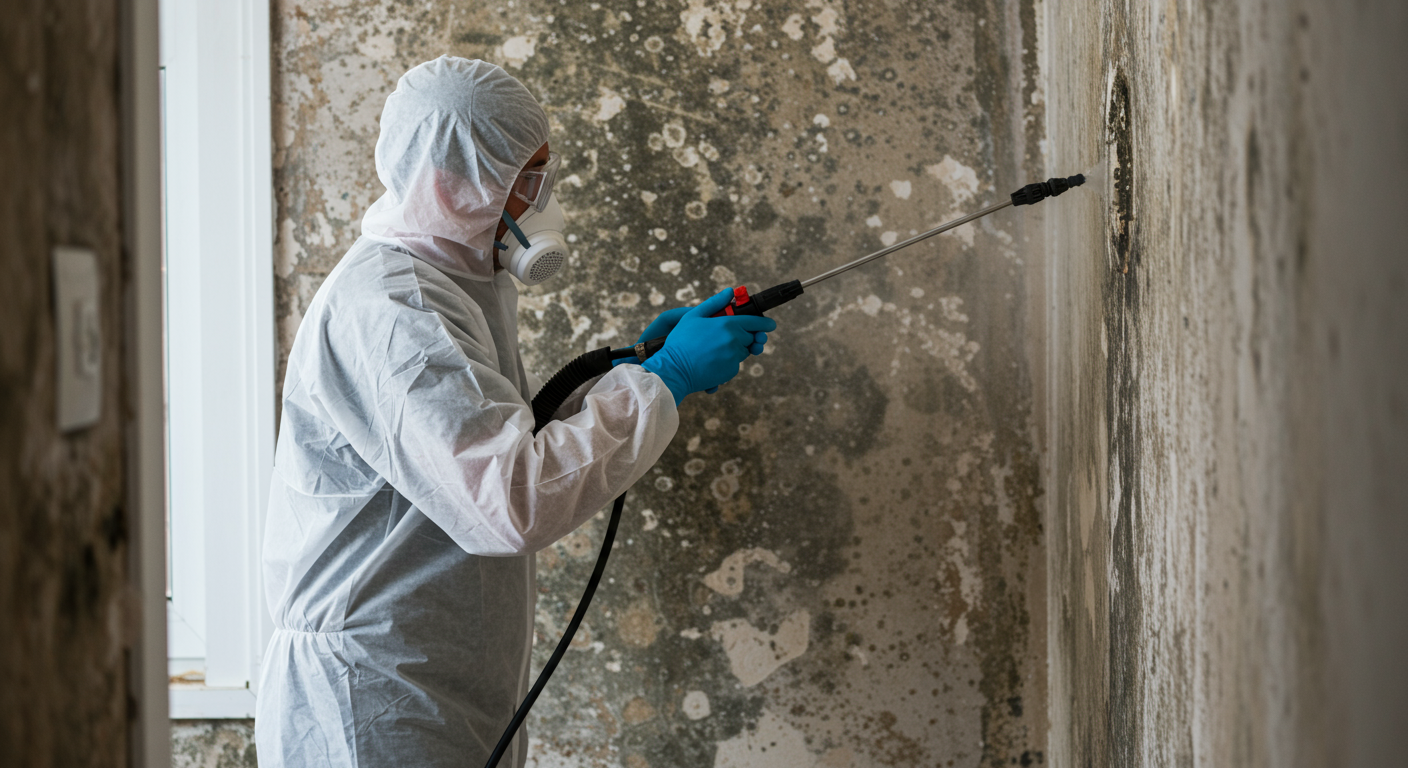
    Before remediation can begin, a thorough mold inspection is essential to identify the extent of the problem and determine the best course of action. Professional mold inspectors use advanced tools and techniques to locate mold, even in hidden areas.

    Importance of Professional Inspections

    Hiring a professional for a mold inspection ensures that all affected areas are identified and addressed. DIY inspections may overlook hidden mold, leading to recurring issues and additional costs in the future. Professionals can also provide a detailed report, which is often required for insurance claims.

    Average Cost for Mold Inspection

    In Sandy, UT, the cost of a professional mold inspection typically ranges between $287 and $357. While this may seem like an additional expense, it is a worthwhile investment to ensure the problem is thoroughly assessed and addressed.

    Mold Inspection Process

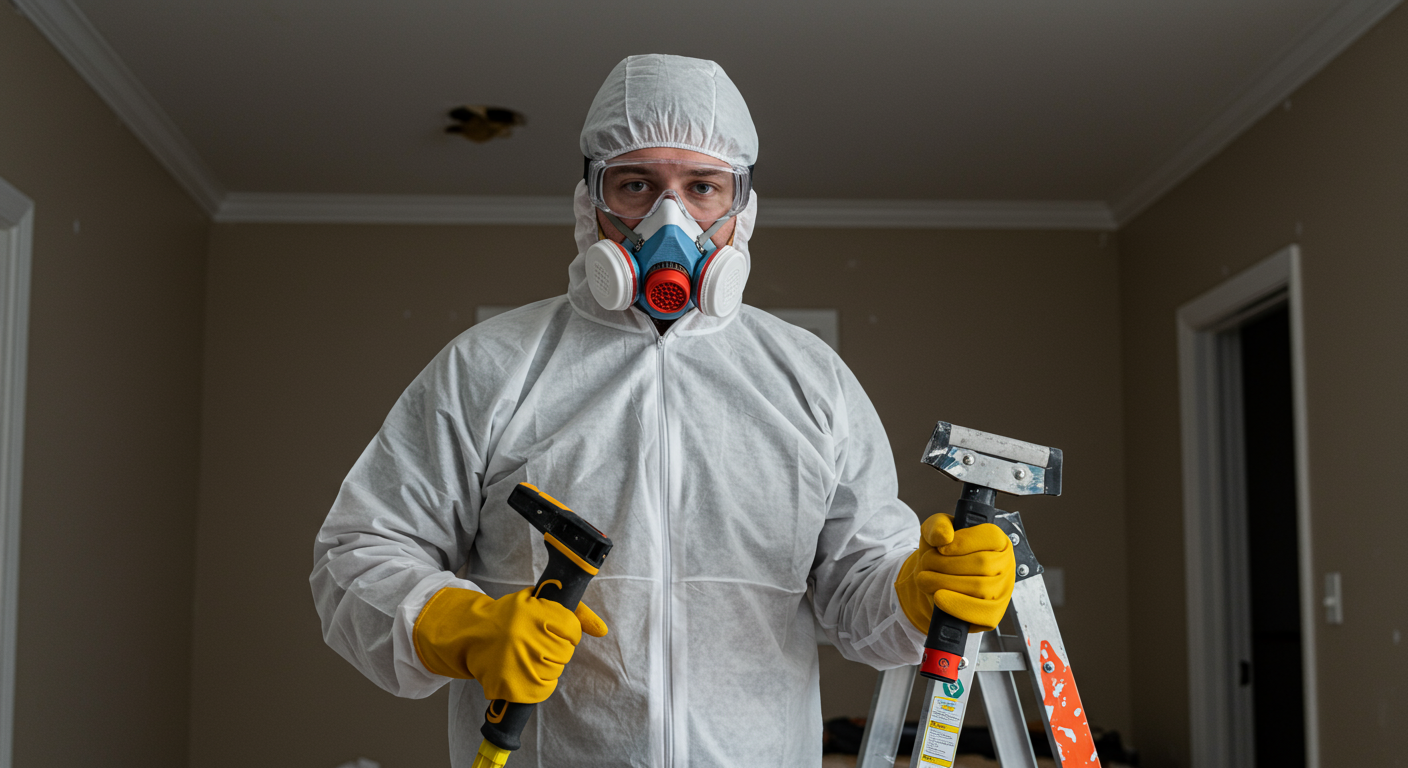
    Choosing the Right Mold Remediation Service

    Selecting the right mold remediation service is crucial for ensuring effective and long-lasting results. With so many options available, it can be challenging to determine which company is the best fit for your needs.

    Tips for Hiring Professionals

    • Check Credentials: Ensure the company is licensed, insured, and certified in mold remediation.
    • Read Reviews: Look for customer reviews and testimonials to gauge the quality of their services.
    • Ask About Methods: Inquire about the techniques and equipment they use for mold removal.
    • Request References: A reputable company should be able to provide references from previous clients.

    How to Obtain Quotes and Compare Services

    To get the best value for your money, obtain quotes from multiple companies and compare their services. Be wary of unusually low estimates, as they may indicate subpar work or hidden fees. A detailed quote should include the scope of work, estimated timeline, and total cost.

    For more information on effective mold remediation techniques, check out Comprehensive Mold Remediation Techniques in Provo, UT.

    Conclusion

    Mold remediation is an essential process for maintaining a safe and healthy home environment. By understanding the costs and factors involved, homeowners in Sandy, UT, can make informed decisions and ensure their property is properly protected. Whether you’re dealing with a minor mold issue or a severe infestation, investing in professional services is the best way to safeguard your home and health.

    For additional resources on mold prevention and home maintenance, visit What to Do If You Find Mold in Your House in South Jordan, UT: A Complete Guide.

  • Transform Your Home: Expert Stucco Popcorn Ceiling Removal in St. George, UT

    Transform Your Home: Expert Stucco Popcorn Ceiling Removal in St. George, UT

    Stucco popcorn ceilings, once a popular design choice, have become a source of frustration for many homeowners. Their outdated look, health risks, and maintenance challenges make them a prime candidate for removal. If you’re in St. George, UT, and considering upgrading your home, professional popcorn ceiling removal services can provide a transformative solution. This guide will walk you through the common issues, benefits, and process of removing stucco popcorn ceilings.

    Common Issues with Stucco Popcorn Ceilings

    Outdated Appearance and Dust Accumulation

    Stucco popcorn ceilings were trendy in the mid-20th century, but their textured appearance has since fallen out of favor. Beyond aesthetics, these ceilings are notorious for trapping dust and cobwebs, making cleaning a tedious task. Over time, this accumulation can dull the overall look of your home, leaving it feeling dated and unkempt.

    Health Risks: Allergens and Asbestos Concerns

    One of the most significant concerns with popcorn ceilings is the potential for asbestos. Homes built before the 1980s often used asbestos in construction materials, including ceiling textures. Disturbing these ceilings without proper precautions can release harmful fibers into the air, posing severe health risks. Additionally, the textured surface can harbor allergens, exacerbating respiratory issues for sensitive individuals.

    Low Buyer Appeal in Real Estate Markets

    If you’re planning to sell your home, a stucco popcorn ceiling can be a dealbreaker for potential buyers. Modern buyers prioritize sleek, updated interiors, and popcorn ceilings can make your property seem outdated. Removing them can significantly boost your home’s market appeal and attract more interest from prospective buyers.

    Professional Removal Services in St. George

    Why Choose Professional Over DIY?

    While DIY removal might seem cost-effective, it comes with risks, especially if asbestos is present. Professional contractors in St. George are equipped with the tools, expertise, and safety measures to handle the job efficiently. They ensure the process is thorough, minimizing the risk of damage to your home or exposure to harmful substances.

    Overview of Local Experts in Popcorn Ceiling Removal

    St. George boasts a range of skilled contractors specializing in popcorn ceiling removal. These professionals use advanced techniques to deliver smooth, flawless ceilings. Many offer free consultations to assess your needs and provide tailored solutions, ensuring customer satisfaction.

    Customer Satisfaction and Testimonials

    Homeowners in St. George who have opted for professional removal services often rave about the results. From improved aesthetics to healthier living spaces, the benefits are undeniable. Positive testimonials highlight the reliability, efficiency, and expertise of local contractors, making them a trusted choice for your home improvement needs.

    Benefits of Removing Stucco Popcorn Ceilings

    Achieving a Modern Aesthetic

    Removing a popcorn ceiling instantly modernizes your home, giving it a clean and contemporary look. Smooth ceilings create a neutral canvas that complements any interior design style, from minimalist to traditional. This simple upgrade can make a significant impact on your home’s overall ambiance.

    Improved Air Quality and Health Benefits

    Eliminating textured ceilings reduces the accumulation of dust, allergens, and potential mold growth. This improvement in air quality can benefit everyone in your household, particularly those with allergies or asthma. Additionally, removing asbestos-containing ceilings eliminates a significant health hazard, ensuring a safer living environment.

    Increased Home Value and Market Appeal

    Investing in popcorn ceiling removal can yield a high return on investment. Modern, updated interiors are more appealing to buyers, potentially increasing your home’s resale value. This upgrade not only enhances your living experience but also positions your property as a competitive option in the real estate market.

    The Removal Process: What to Expect

    Initial Assessment and Preparation

    The first step in the removal process is a thorough assessment of your ceiling. Professionals will test for asbestos and evaluate the condition of the ceiling to determine the best approach. Once the assessment is complete, they will prepare the area by covering furniture, floors, and walls to protect them from dust and debris.

    Step-by-Step Removal Method

    The removal process typically involves wetting the ceiling to loosen the texture, followed by careful scraping to reveal the smooth surface underneath. Professionals use specialized tools and techniques to ensure precision and minimize mess. After the texture is removed, the ceiling is sanded and primed, ready for painting or further customization.

    Timeline and Pricing Estimates

    The duration and cost of the project depend on factors such as the size of the area, the presence of asbestos, and the desired finish. On average, popcorn ceiling removal takes 1-3 days for a standard-sized room. Pricing varies, but many contractors in St. George offer competitive rates and transparent estimates, ensuring you know what to expect upfront.

    A professional contractor in protective gear carefully scraping away a stucco popcorn ceiling in a well-lit living room. Dust particles are visible in the air, highlighting the removal process.

    Transforming your home by removing stucco popcorn ceilings is a worthwhile investment. From enhancing aesthetics to improving health and increasing property value, the benefits are clear. If you’re in St. George, UT, consider reaching out to local experts for professional removal services. With their help, you can achieve a modern, clean, and inviting living space.

    For more insights on maintaining a healthy home, check out our Comprehensive Guide to Mold Testing in Your Home in Murray, UT.

  • Top Mold Treatment Solutions After Flooding in Salt Lake City, UT: Your Comprehensive Guide

    Top Mold Treatment Solutions After Flooding in Salt Lake City, UT: Your Comprehensive Guide

    Flooding can wreak havoc on homes and businesses, leaving behind not only structural damage but also the perfect environment for mold growth. In Salt Lake City, UT, where flooding can occur due to seasonal weather changes, addressing mold promptly is crucial. This guide will provide you with the best mold treatment solutions to protect your property and health.

    Understanding Mold Growth After Flooding

    The Science Behind Mold Development

    Mold thrives in damp and humid conditions, making flooded areas an ideal breeding ground. When water infiltrates walls, floors, and other porous materials, it creates a moist environment that encourages mold spores to grow. Within 24 to 48 hours of flooding, mold can begin to develop, spreading rapidly if left untreated.

    Common Types of Mold Found in Flooded Areas

    Flooded areas often harbor various types of mold, including black mold (Stachybotrys), Aspergillus, and Penicillium. Black mold is particularly concerning due to its potential health risks. Identifying the type of mold present is essential for determining the appropriate treatment method.

    Why Professional Mold Remediation is Essential

    Health Risks Associated with Mold Exposure

    Exposure to mold can lead to numerous health issues, including respiratory problems, allergic reactions, and skin irritation. For individuals with asthma or weakened immune systems, mold exposure can be particularly dangerous. Addressing mold growth promptly is vital to minimize these health risks.

    Benefits of Hiring Certified Mold Remediation Experts

    Professional mold remediation experts have the tools, knowledge, and experience to effectively remove mold and prevent its recurrence. They use advanced techniques such as moisture detection and containment to ensure thorough treatment. Hiring certified professionals also ensures compliance with safety standards and regulations.

    Effective Mold Treatment Methods

    Step-by-Step Mold Remediation Process

    1. Inspection and Assessment: Professionals begin by inspecting the affected area to determine the extent of mold growth and identify the source of moisture.
    2. Containment: Containment measures, such as sealing off the area, prevent mold spores from spreading to other parts of the property.
    3. Removal and Cleaning: Mold-infested materials are removed, and surfaces are cleaned using specialized solutions.
    4. Drying and Dehumidification: High-powered fans and dehumidifiers are used to eliminate moisture and prevent future mold growth.
    5. Restoration: Damaged areas are repaired or replaced to restore the property to its pre-flood condition.

    Recommended Products for DIY Mold Treatment

    For minor mold issues, homeowners can use products like mold-killing sprays and bleach solutions. However, it’s important to follow safety precautions, such as wearing gloves and masks, to avoid exposure. Keep in mind that DIY methods may not be sufficient for extensive mold growth.

    A professional mold remediation technician in protective gear is actively treating a wall affected by mold in a residential home.

    Preventing Future Mold Growth

    Tips for Mold Prevention After Flooding

    1. Dry the Area Quickly: Use fans and dehumidifiers to dry the affected area within 24 to 48 hours of flooding.
    2. Remove Porous Materials: Discard water-damaged items such as carpets and drywall to prevent mold growth.
    3. Improve Ventilation: Ensure proper airflow in your home by using exhaust fans and opening windows.
    4. Use Mold-Resistant Products: Consider using mold-resistant drywall and paint in areas prone to moisture.

    Importance of Regular Inspections and Maintenance

    Regular inspections can help identify potential mold issues before they become severe. Hiring professionals for routine maintenance ensures that your property remains mold-free. For more detailed guidance, check out Expert Commercial Mold Inspection Services in South Jordan, UT – Protect Your Property Today!.

    Conclusion

    Mold treatment after flooding is a critical step in protecting your property and health. By understanding the causes of mold growth, seeking professional remediation services, and taking preventive measures, you can effectively address mold issues in Salt Lake City, UT. For additional tips on mold prevention and removal, explore Effective Solutions for Black Mold on Ceilings in Murray, UT: Expert Removal & Prevention Tips. Don’t let mold take over—act quickly and decisively to safeguard your home or business.

  • Safe and Effective DIY Asbestos Popcorn Ceiling Removal in Ogden, UT: A Comprehensive Guide

    Safe and Effective DIY Asbestos Popcorn Ceiling Removal in Ogden, UT: A Comprehensive Guide

    Popcorn ceilings, once a popular design trend, have become a concern for homeowners due to the potential presence of asbestos. If you’re in Ogden, UT, and considering removing your popcorn ceiling, it’s crucial to understand the risks and steps involved. This guide will walk you through the process of DIY asbestos popcorn ceiling removal while emphasizing safety and efficiency.

    Understanding Asbestos in Popcorn Ceilings

    What is Asbestos and Why is it a Concern?

    Asbestos is a naturally occurring mineral once widely used in construction for its durability and fire-resistant properties. However, it poses significant health risks when its fibers become airborne and are inhaled. Popcorn ceilings installed before 1980 often contain asbestos, making their removal a potentially hazardous task.

    Identifying Popcorn Ceilings Installed Before 1980

    If your home was built or renovated before 1980, there’s a chance your popcorn ceiling contains asbestos. To confirm, you can purchase an asbestos testing kit or hire a professional to analyze a sample. Testing is essential before proceeding with removal to ensure your safety.

    Health Risks Associated with Asbestos Exposure

    Exposure to asbestos fibers can lead to severe health conditions, including asbestosis, lung cancer, and mesothelioma. These diseases develop over time, making it critical to handle asbestos-containing materials with care. Proper precautions during removal are non-negotiable to protect yourself and your family.

    Preparing for DIY Removal

    Essential Tools and Materials Needed

    To safely remove a popcorn ceiling, you’ll need the following tools and materials:

    • Asbestos testing kit
    • Protective gear (respirator mask, goggles, gloves, and coveralls)
    • Plastic sheeting and painter’s tape
    • Scraper and spray bottle
    • Ladder and drop cloths
    • Disposal bags for hazardous materials

    Having the right tools ensures a smoother and safer removal process.

    Safety Precautions: Gear Up for Protection

    Safety is paramount when dealing with asbestos. Wear a high-quality respirator mask to prevent inhaling fibers, and use goggles and gloves to protect your eyes and skin. Disposable coveralls are also recommended to avoid contamination. Ensure the room is well-ventilated but avoid using fans, as they can spread asbestos particles.

    Preparing Your Space: A Step-by-Step Checklist

    1. Clear the Room: Remove all furniture and cover the floor with plastic sheeting.
    2. Seal Off the Area: Use painter’s tape to secure plastic sheeting over doors, vents, and windows.
    3. Turn Off HVAC Systems: This prevents asbestos fibers from circulating throughout your home.
    4. Gather Your Tools: Arrange all necessary equipment within easy reach.
    5. Inform Household Members: Ensure no one enters the workspace during the removal process.

    Proper preparation minimizes risks and ensures a controlled environment for asbestos removal.

    The DIY Removal Process

    Step 1: Testing for Asbestos

    Before starting the removal process, use an asbestos testing kit to confirm the presence of asbestos. Follow the kit’s instructions carefully and send the sample to a certified lab for analysis. If the results indicate asbestos, proceed with extreme caution or consider hiring professionals.

    Step 2: Removing the Popcorn Texture

    1. Dampen the Ceiling: Fill a spray bottle with water and lightly mist the ceiling. This helps to reduce dust and makes scraping easier.
    2. Scrape Gently: Use a scraper to remove the popcorn texture. Work in small sections and avoid applying too much pressure to prevent damaging the ceiling.
    3. Contain the Debris: Collect the removed material in disposal bags labeled for hazardous waste. Seal the bags tightly to prevent contamination.

    This step requires patience and attention to detail to ensure thorough removal without spreading asbestos fibers.

    A homeowner dressed in full safety gear, including a mask, goggles, and gloves, stands in a room with a ladder and tools ready for popcorn ceiling removal. The focus is on the homeowner's determined expression as they prepare for the task.

    Step 3: Cleaning and Finishing Touches

    After removing the popcorn texture, clean the area thoroughly:

    • Vacuum with a HEPA Filter: Use a vacuum designed for hazardous materials to clean up any remaining debris.
    • Wipe Down Surfaces: Use damp cloths to clean walls, floors, and other surfaces.
    • Inspect the Ceiling: Check for any remaining texture and remove it as needed.

    Once the area is clean, you can repaint or refinish the ceiling to your liking.

    When to Call in the Professionals

    Signs That You Should Hire Experts

    While DIY removal can be cost-effective, there are situations where professional help is necessary:

    • The ceiling contains a high concentration of asbestos.
    • You lack the proper tools or experience.
    • The area is too large or complex to handle safely.

    If you’re unsure about your ability to remove the ceiling safely, it’s better to consult a professional.

    Benefits of Professional Services Over DIY

    Hiring professionals ensures the job is done safely and efficiently. Experts have the training and equipment to handle asbestos removal without risking exposure. They also adhere to local regulations, ensuring proper disposal of hazardous materials.

    Cost Considerations for Professional Removal

    Professional asbestos removal services in Ogden, UT, typically range from $1,500 to $3,000, depending on the size and complexity of the project. While this may seem costly, it provides peace of mind and eliminates the risks associated with DIY removal.

    Removing an asbestos popcorn ceiling is a challenging but achievable task if approached with the right knowledge and precautions. By following this guide, you can safely transform your space while protecting your health and the environment. If you’re unsure about any step, don’t hesitate to seek professional assistance to ensure the job is done correctly. For more tips on home improvement and safety, check out this guide on mold removal.